|
Search 650Rider.com and XS650.com using Google!
|
 | |
|
|
|
| xs650 > > Custom Work: Chop, Bob, Cafe and Flattracker - Streettracker > > Cafe Racer > > Tintin's Cafe Racer project - BIG PICS WARNING! |
|---|
Tintin's Cafe Racer project - BIG PICS WARNING!
Go to page Previous 1, 2, 3 Next |
| Author |
Message |
jayel
650Rider Supporter


Joined: Apr 16, 2006
Posts: 3417
Location: SE Iowa 1974 TX650A
|
 Posted: July 20, 2007, 11:40 pm Post subject: Re: Tintin's Cafe Racer project - BIG PICS WARNING! Posted: July 20, 2007, 11:40 pm Post subject: Re: Tintin's Cafe Racer project - BIG PICS WARNING! |
|
when you click on NEW TOPIC instead of POST REPLY, you could go back edit (delete) your pics and then reenter them downsized
_________________
all it takes is time and money -- Where are we going and why are we in this hand basket? |
|
| Back to top |
|
 |
tintin
Full Member


Joined: May 07, 2007
Posts: 96
|
| Posted: July 21, 2007, 10:29 am Post subject: Re: Tintin's Cafe Racer project - BIG PICS WARNING! |
|
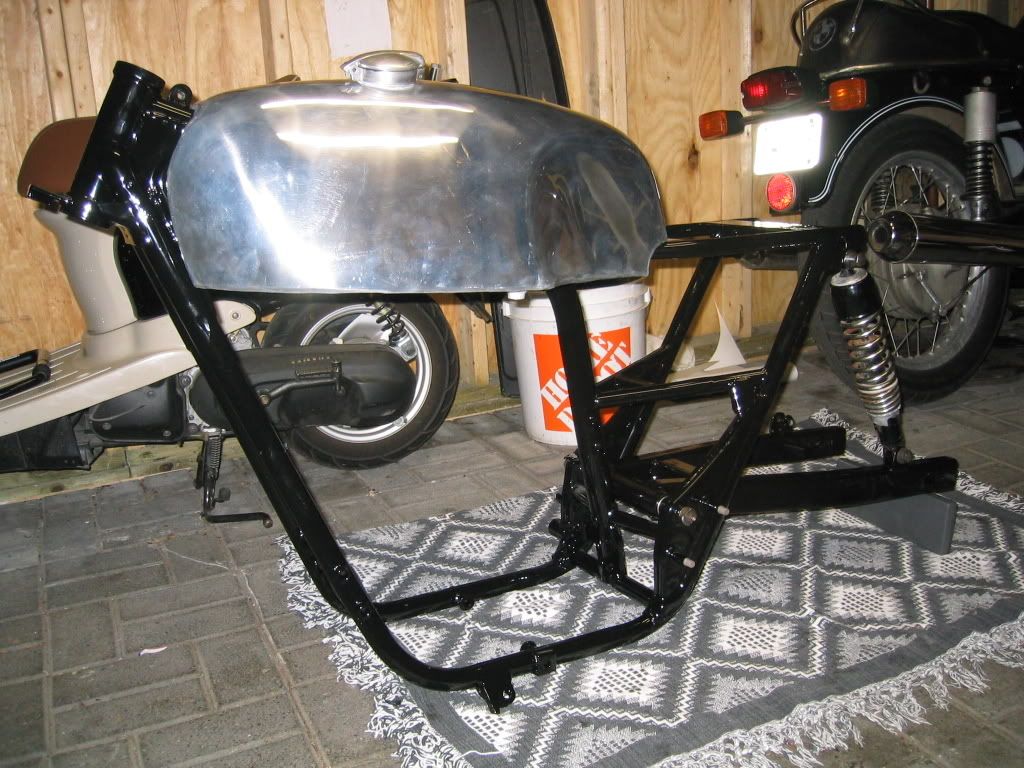
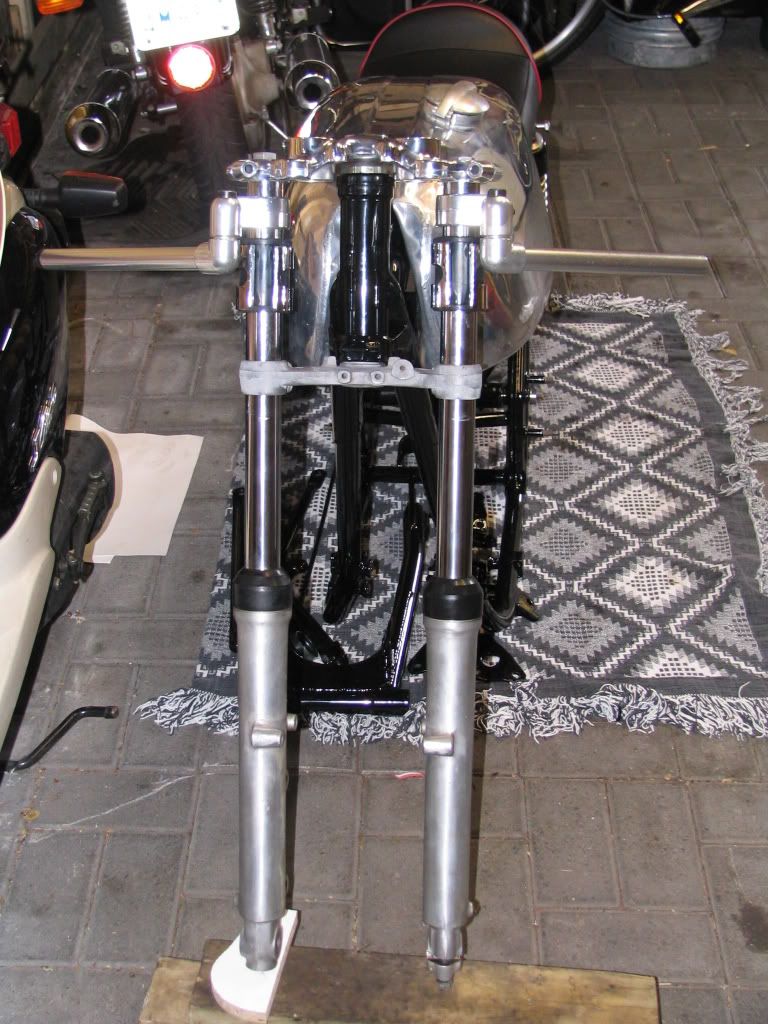
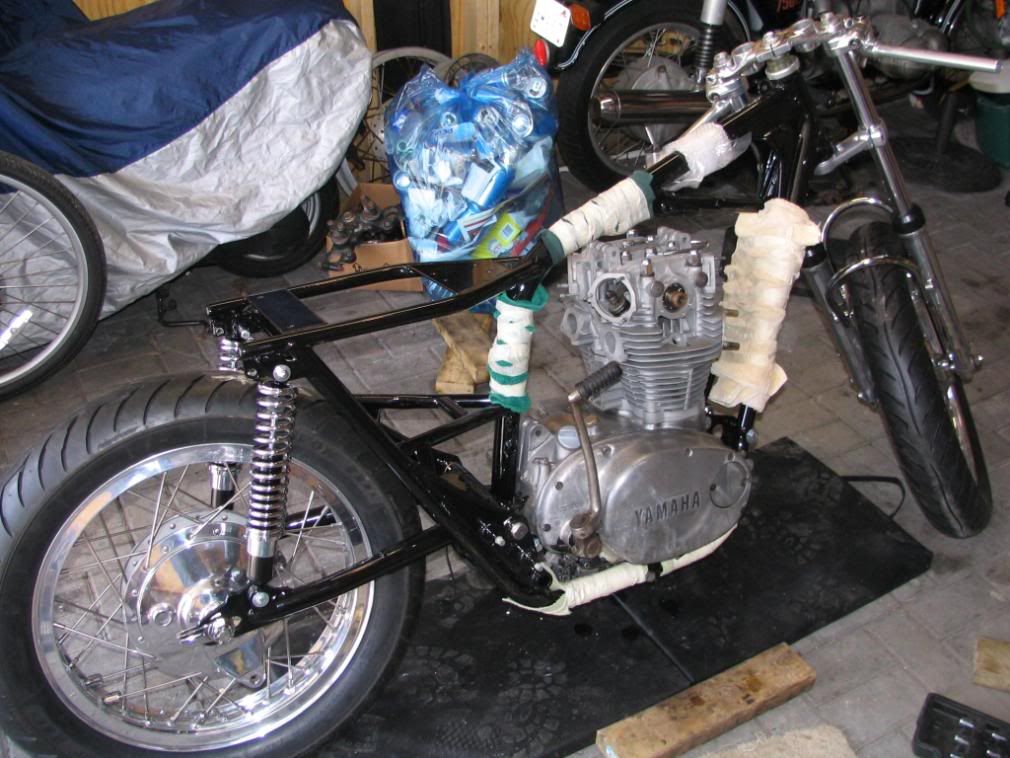
So I pressed the new needle bearings into the swingarm, used my dremel and a little drum sander head to remove the powder from the pivot bolt holes in the frame (very very carefully mind you - insert into hole turned off, turn on, sand, turn off, remove from hole) and popped the swingarm on just to see how it looked. Left the dustcaps off the swingarm pivot - just temporary install and the dustcaps need to be shined up 
Quite nice - probably going to stick with the Radian arm on it, but we'll see how the stocker looks on it once the bronze bushings come and I can have a look.
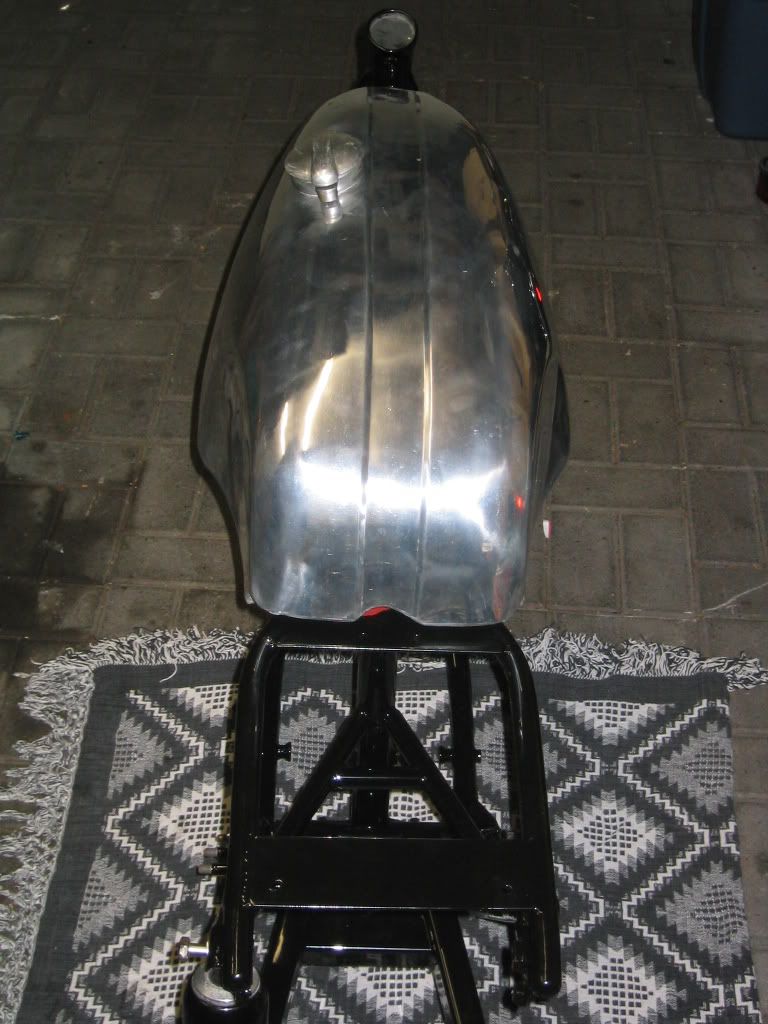
Took some pics with the alloy tank on it, which after 8 months of handling, really needs a bit of a polish!

|
|
| Back to top |
|
|
INXS650
650Rider Supporter

Joined: Mar 22, 2007
Posts: 645
|
| Posted: July 21, 2007, 2:47 pm Post subject: Re: Tintin's Cafe Racer project - BIG PICS WARNING! |
|
| I'd go with the Radian if you've already done the work for it. Seems like a waste if you don't. Looking good though.
|
|
| Back to top |
|
|
tintin
Full Member
Joined: May 07, 2007
Posts: 96
|
| Posted: July 24, 2007, 4:51 pm Post subject: Re: Tintin's Cafe Racer project - BIG PICS WARNING! |
|
Will likely go Radian, but I do like the look of the stock. The Radian is a lot longer than the 1972 stock arm - like 3 inches more wheelbase.
I've gotten both arms ready - bronze bushings in the stock and fresh needle bearings in the Radian. Both have been cleaned up - no chain guard mounts, and powdercoated at the same time so no color variance from the frame - all one batch.
We'll see what happens. I might run the stock arm for now, until I take the rear wheel apart, polish the rims and hubs, replace the spokes and then buy new bearings to fit the 17mm Radian axle.
|
|
| Back to top |
|
|
tintin
Full Member
Joined: May 07, 2007
Posts: 96
|
| Posted: July 24, 2007, 4:52 pm Post subject: Re: Tintin's Cafe Racer project - BIG PICS WARNING! |
|
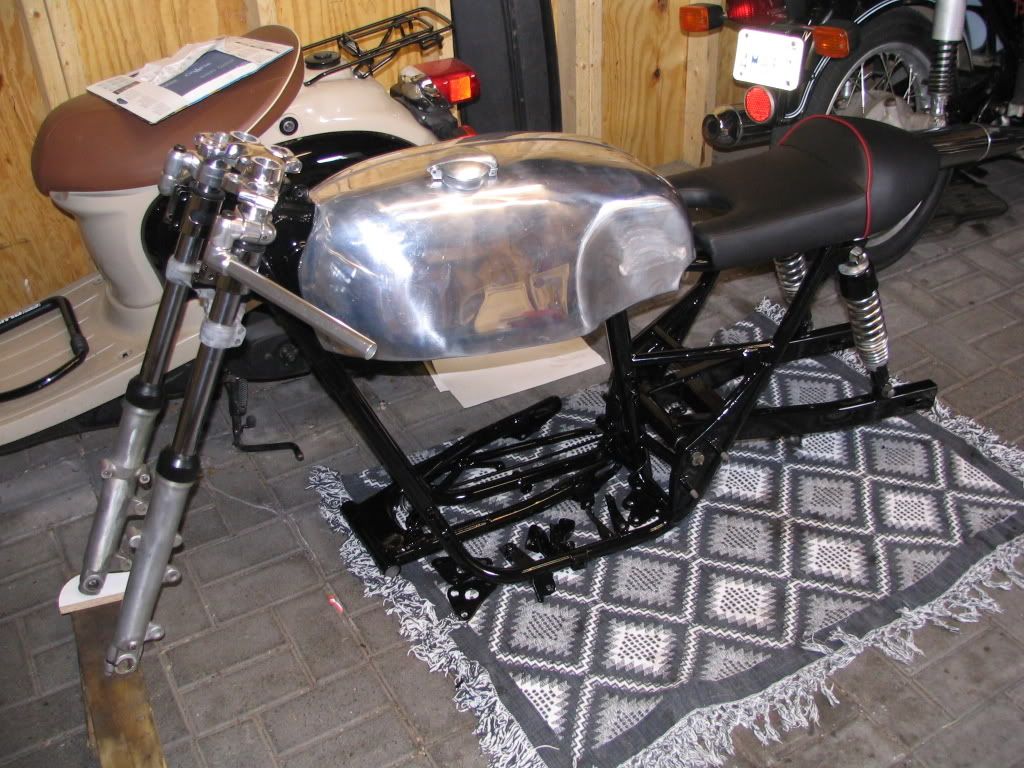
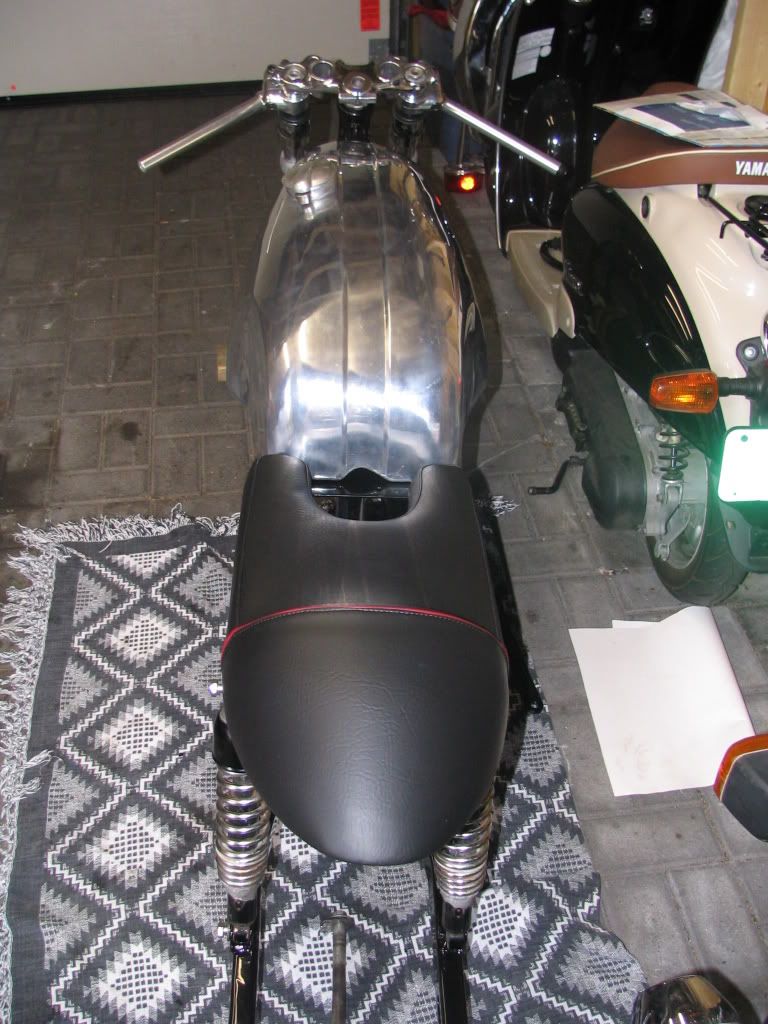
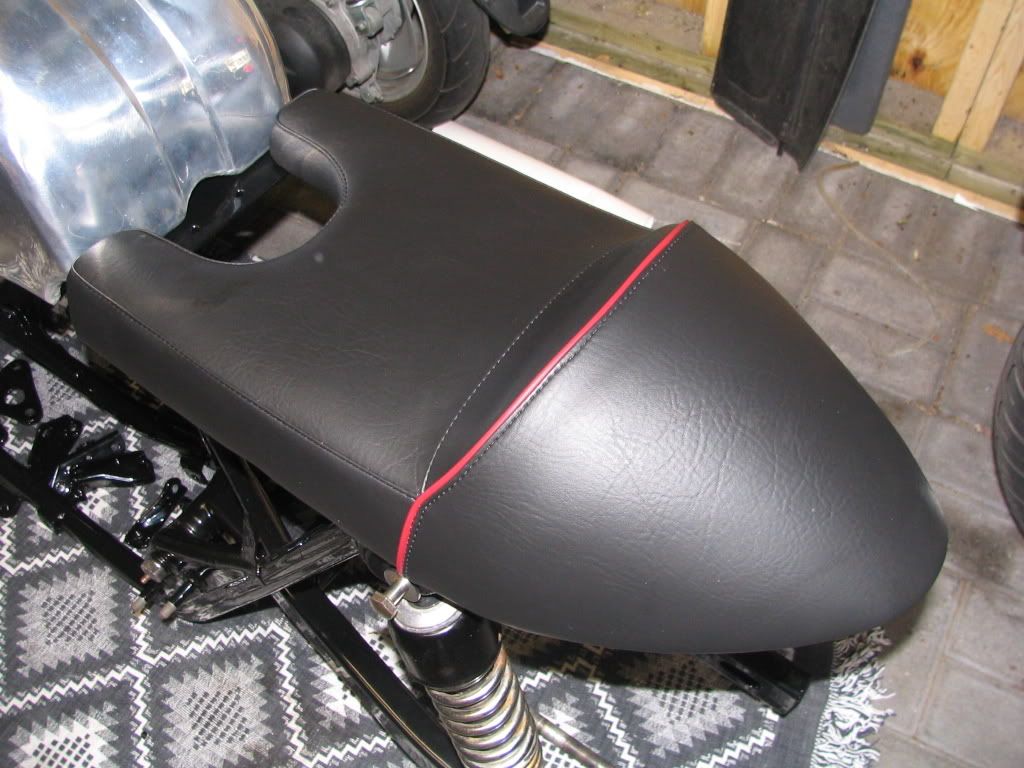
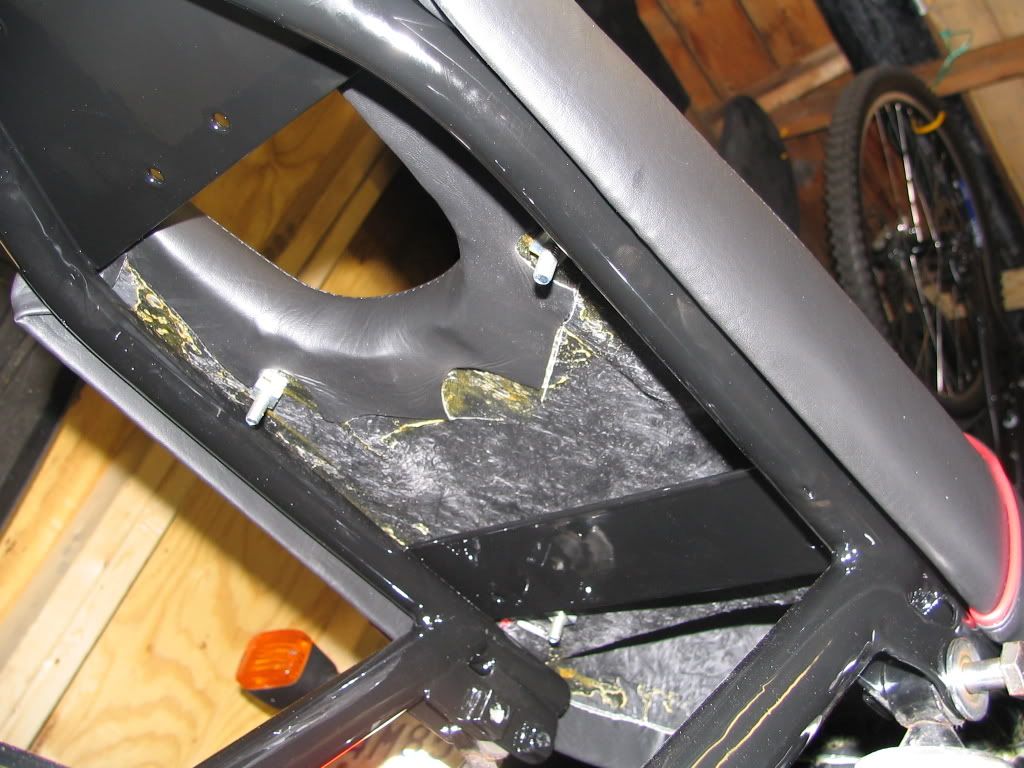
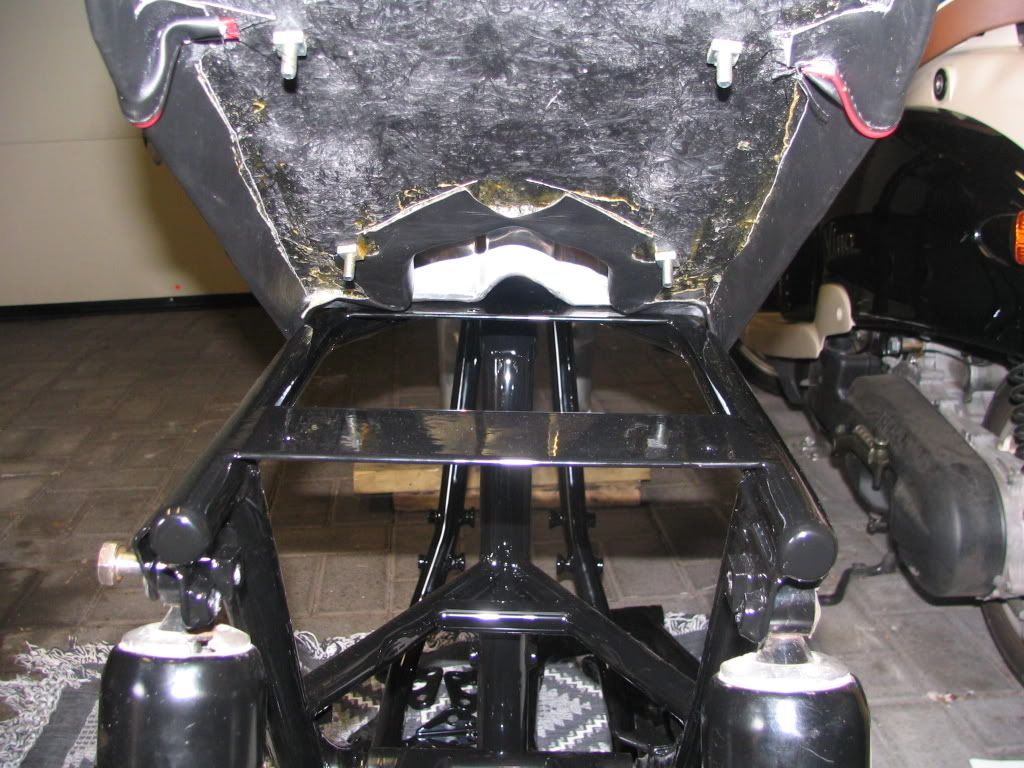
My Manx seat from Clubmanracing.com arrived today 
Fits better than OJ's glove. Like it was made for the bike really. Couldn't fit any better - exactly the right width and length. Just need to work out some rubber cushions about 1/2 inch thick to seat it on the frame rails without ruining the finish on the frame and some simple brackets to hold it down at the back end.
Just so you know how particular I am, the reason I bought the petcocks I did is they have little red vinyl coated levers, matching the red piping on the seat Aside from that the rest of the bike will be black and alloy.
|
|
| Back to top |
|
|
Kablazzie
Full Member

Joined: Aug 14, 2007
Posts: 61
Location: Knoxvegas, TN
|
| Posted: September 3, 2007, 10:15 pm Post subject: Re: Tintin's Cafe Racer project - BIG PICS WARNING! |
|
| I love this bike. Any updates?
|
|
| Back to top |
|
|
georelle
Full Member
Joined: May 05, 2007
Posts: 208
Location: South Dakota
|
| Posted: September 4, 2007, 8:16 am Post subject: Re: Tintin's Cafe Racer project - BIG PICS WARNING! |
|
It looks great. The top on the triple tree really shines up nice. Thanks for the photos and giving us some ideas.
Awesome bike.
Georelle
_________________
Check out my gallery!
'76 XS650
'75 XS650
'02 Suzuki VZ800
'78 Honda CM185T |
|
| Back to top |
|
|
KYLEPRESTON
650Rider Supporter

Joined: Jul 24, 2006
Posts: 561
Location: Connecticut
|
| Posted: September 4, 2007, 10:26 am Post subject: Re: Tintin's Cafe Racer project - BIG PICS WARNING! |
|
YOU COULD HAVE USED THE SWING ARM FROM A LATER XS THAT IS WHAT I DID FOR MY 73TX BUILD THE SWING ARM FROM THE 75 AND UP IS 2 INCHES LONGER THAN STOCK FOR YOU AND NO MODIFICATION NEEDED.
LOOKING GREAT THOUGH. HOW IS THAT SEAT GOING TO GET MOUNTED?
CHEERS KYLE
|
|
| Back to top |
|
|
tintin
Full Member
Joined: May 07, 2007
Posts: 96
|
| Posted: September 12, 2007, 6:35 pm Post subject: Re: Tintin's Cafe Racer project - BIG PICS WARNING! |
|
Sorry its been so long between updates - summer vacation and logistics have conspired against me.
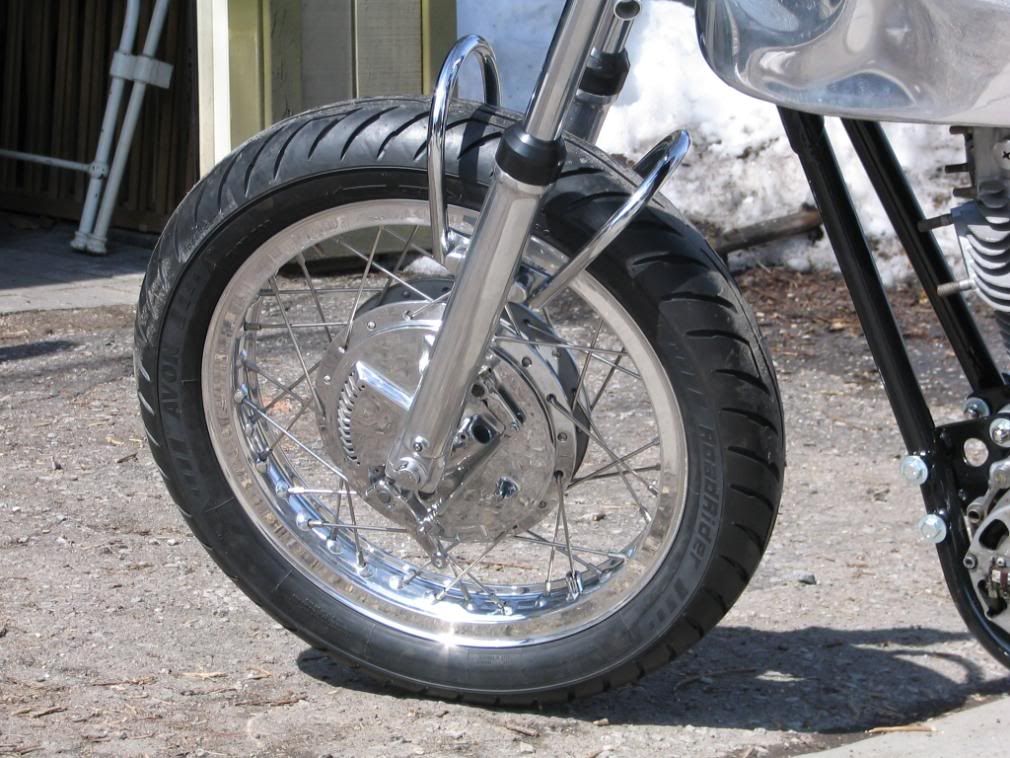
I've been gathering up more parts. I now have two 18" rear alloy rims which will go on the bike front and back. They're drilled for drum hubs so one is being laced to the front drum brake from a 1970 model.
The rims, hubs, forks etc. etc. are out for professional polishing. Once I get the rims/hubs back, then I can get the right spokes and get the wheels laced up, bearings put in, and Avon Roadriders put on.
Once that's done, the reassembly will begin. Engine is close to ready to be put into the frame, but I'm holding out till I have the bits I need to get it up on two wheels.
The seat mounting hasn't been sorted out completely yet. I'll be putting some rubber between the seat and frame - probably just cemented to the underside of the seat. Then I'll turn the mounting bolts into female with a coupling nut. This will allow the seat to be mounted with stainless socket-head bolts from below, through the alloy tray I'm making up to carry electrical, battery etc. which will sit in the area under the seat, dropping perhaps an inch below the frame rails.
Lots of work to do. I had always anticipated this taking a couple of years, and started in April, so I'm going a lot faster than I thought. Just need to get over the current hump and it will start to look like a bike again.
|
|
| Back to top |
|
|
tintin
Full Member
Joined: May 07, 2007
Posts: 96
|
| Posted: September 12, 2007, 6:37 pm Post subject: Re: Tintin's Cafe Racer project - BIG PICS WARNING! |
|
Oh, and my goal with the swingarm wasn't to extend the wheelbase - it was to get a stiffer swingarm. Using a Radian arm is a pretty common mod on these bikes, but they work much much better with the 1973+ frames.
Up to 1972 it would seem the swingarm is shorter AND narrower at the shock mounts making modification necessary, even of another later XS swingarm.
|
|
| Back to top |
|
|
tintin
Full Member
Joined: May 07, 2007
Posts: 96
|
| Posted: March 24, 2008, 11:01 pm Post subject: Re: Tintin's Cafe Racer project - BIG PICS WARNING! |
|
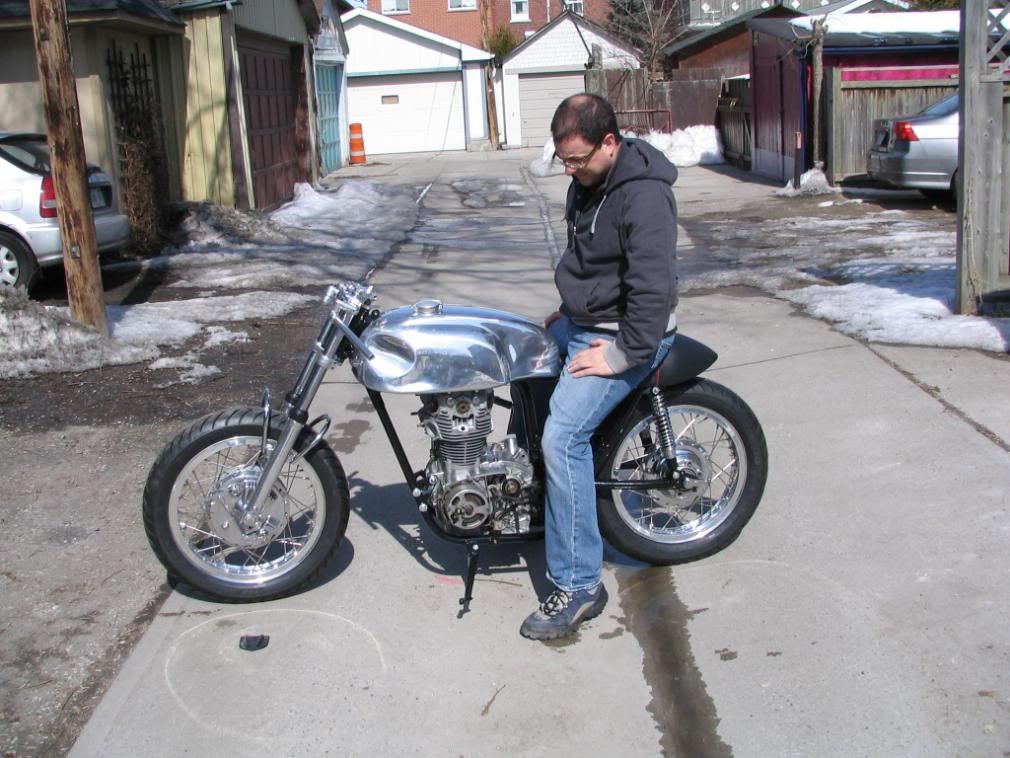
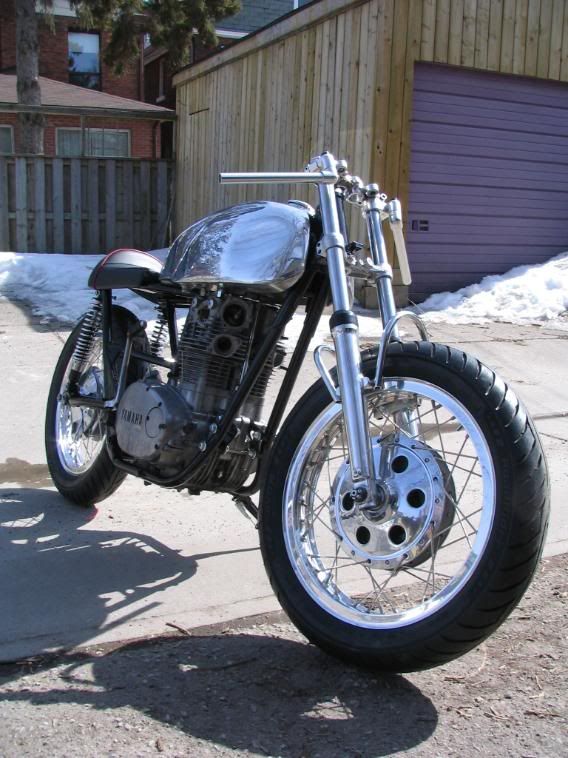
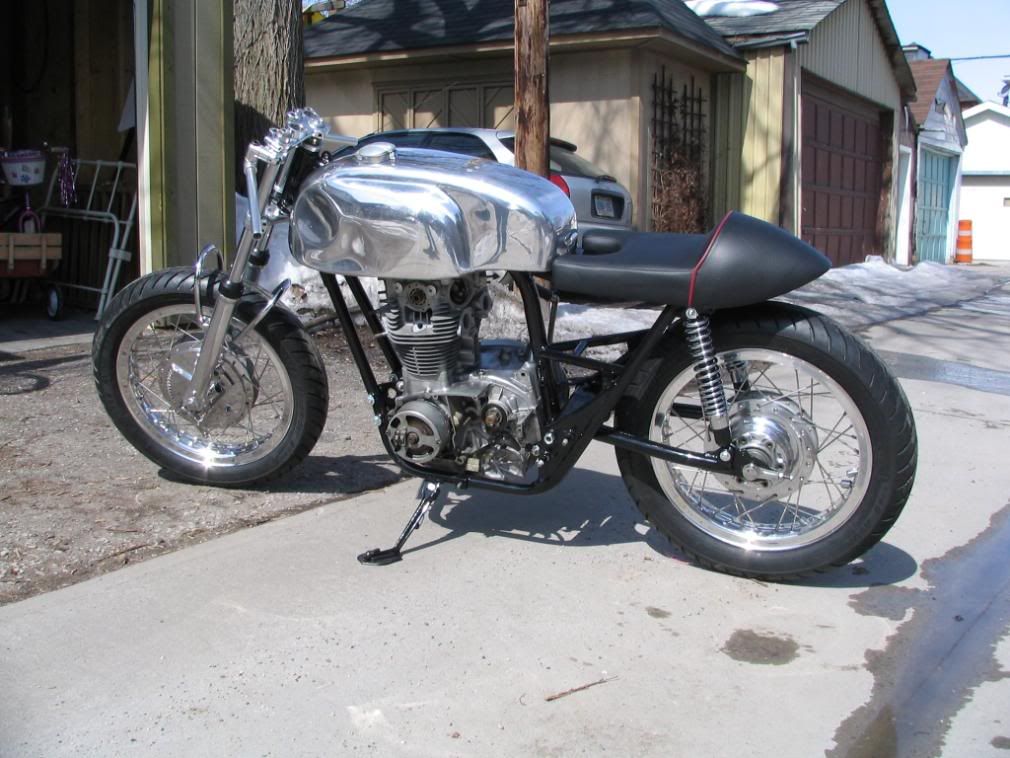
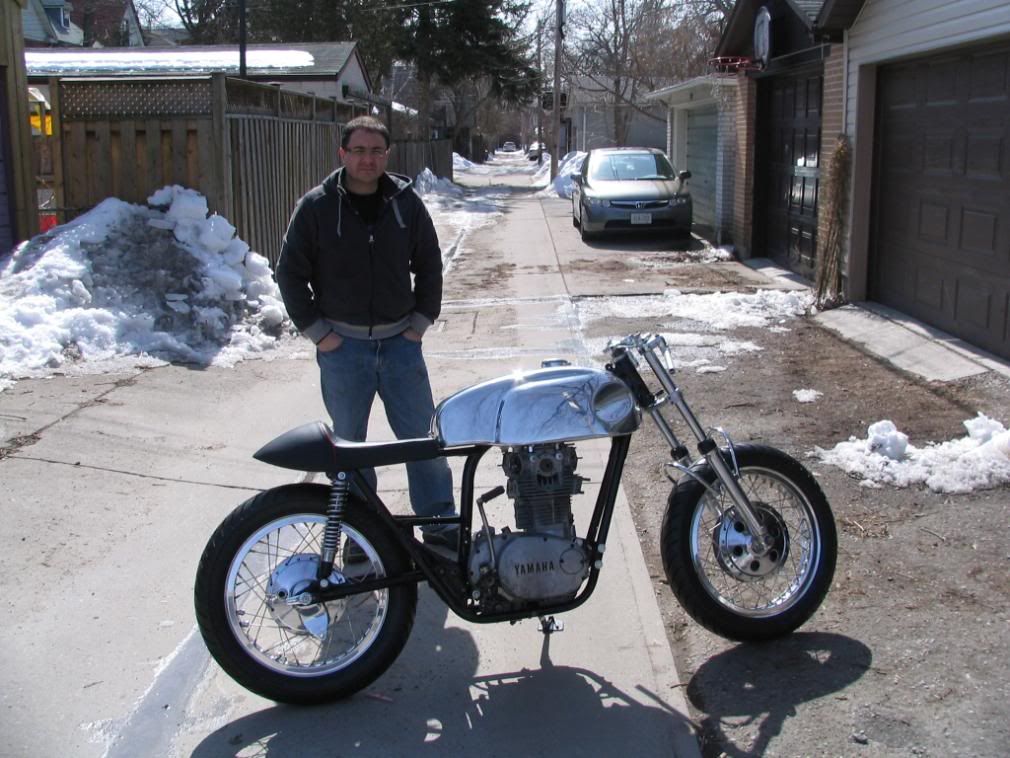
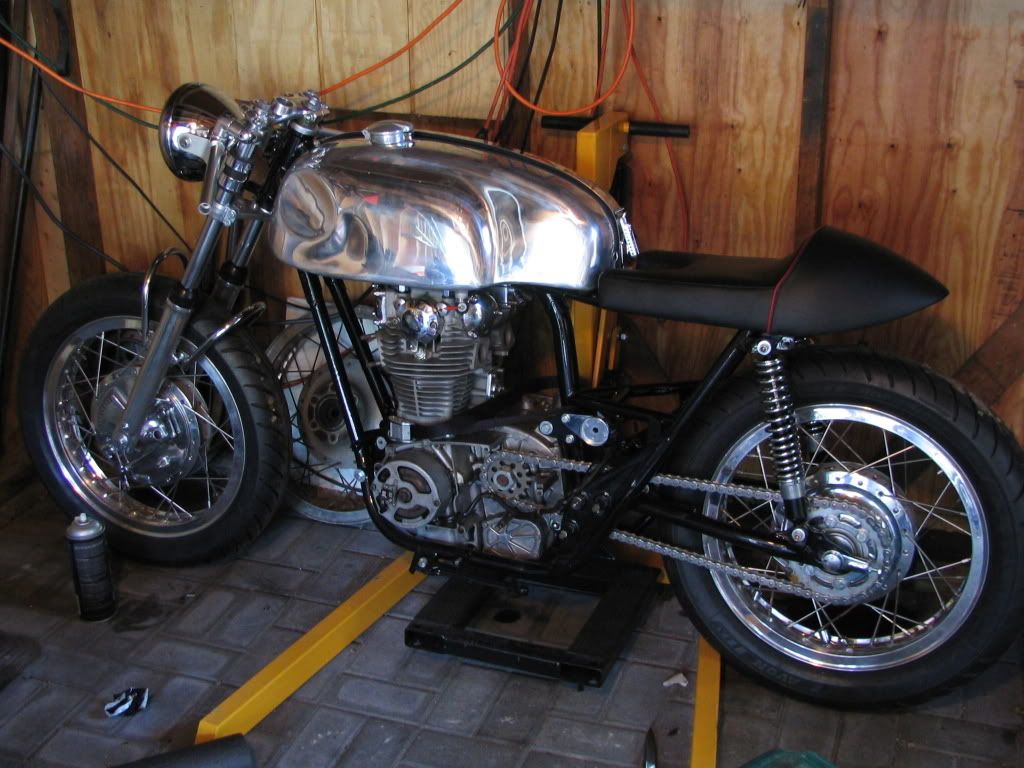
Hey guys - long time no post. Think you might like what's happened in the last few months.
Ended up getting a different alloy tank - an Evan Wilcox custom tank made for the XS650 (no, I didn't shell out the $1500 he sells them for!) - got the bike on two wheels yesterday. Yeah, I'm working slowly but it's coming together.

|
|
| Back to top |
|
|
sswagon
New Member

Joined: Mar 24, 2008
Posts: 7
|
| Posted: March 24, 2008, 11:15 pm Post subject: Re: Tintin's Cafe Racer project - BIG PICS WARNING! |
|
Dam sweet bike man very nicely done!!!!
Love everything but that tank and seat is killer!!!
The rims and drums look awsome!!!
|
|
| Back to top |
|
|
tintin
Full Member
Joined: May 07, 2007
Posts: 96
|
| Posted: March 25, 2008, 8:26 am Post subject: Re: Tintin's Cafe Racer project - BIG PICS WARNING! |
|
Thanks - the engine is a lot cleaner than it looks, and I have fully polished engine covers, valve covers etc. ready to bolt on. It's got fresh 0.5mm over pistons/rings etc. in it, fresh valve job blah blah blah. Nothing exotic, just a stock engine.
I'm planning on grabbing another engine to do a complete tear down and maybe something a little 'hotter' in terms of the cam etc. to go with the bike.
|
|
| Back to top |
|
|
TheDude
Full Member

Joined: Feb 15, 2008
Posts: 152
Location: Arcata, CA
|
| Posted: March 25, 2008, 11:31 am Post subject: Re: Tintin's Cafe Racer project - BIG PICS WARNING! |
|
Yes, that tank, seat, and wheel combo is truly inspiring. Got any tips for polishing? I want to make my wheels look just like that.
_________________
'78 XS650E Standard |
|
| Back to top |
|
|
tintin
Full Member
Joined: May 07, 2007
Posts: 96
|
| Posted: March 25, 2008, 11:55 am Post subject: Re: Tintin's Cafe Racer project - BIG PICS WARNING! |
|
Well, my only tip is $$$$  I know people love to do the work themselves, and I love wrenching. BUT, I hate polishing, I don't have the proper facility or equipment to do a proper job safely, and for those parts like rims/hubs that can't be done easily, I farmed out the work. I know people love to do the work themselves, and I love wrenching. BUT, I hate polishing, I don't have the proper facility or equipment to do a proper job safely, and for those parts like rims/hubs that can't be done easily, I farmed out the work.
It wasn't cheap. Would have been cheaper to buy new rims, or possibly to have them chromed. The anodizing had to be stripped, and then they were professionally polished.
The upside of professional polishing is the surface is way smoother than I'd have been able to achieve, which will make maintenance polishing done by me much easier and more effective.
|
|
| Back to top |
|
|
Finksies
Full Member

Joined: Jan 26, 2008
Posts: 178
Location: Windham, NH
|
| Posted: March 26, 2008, 11:24 am Post subject: Re: Tintin's Cafe Racer project - BIG PICS WARNING! |
|
| Geeze love this build, its makes me wanna build one of these things so bad, I think it gunna be my next xs project. Couple of questions.... What happened to the dirt bike looking swing arm? why the tank change, I think the other one looked really good as well.
|
|
| Back to top |
|
|
tintin
Full Member
Joined: May 07, 2007
Posts: 96
|
| Posted: March 26, 2008, 1:17 pm Post subject: Re: Tintin's Cafe Racer project - BIG PICS WARNING! |
|
Well, I ditched the Radian swingarm for a couple of reasons. One was I would be into different wheel bearings and custom spacers to make it work. The Radian has a 17mm axle compared to the 20mm XS650 axle.
Also, people started paying big bucks for Radian swingarms, and I had a chance to sell it and get all my money back out - I paid to have the shock mounts moved to align better with the stock locations, put in new bearings and had it powdercoated.
Last but not least, I decided I wanted round tubing to maintain a more vintage / British look. I know there were lots of square swingarms back in the day, and maybe I could have put a Dresda sticker on it, but I do like the round tubing on this one.
I may switch to the longer later model swingarm though. The one on the bike now is a 1972 model and is a lot shorter than later years, of which I have 2 sitting in my rafters. Just need powdercoating and bronze bushings.
The tank swap was a spur of the moment thing. I came across this Evan Wilcox tank which is much more in keeping with the styling I was after for the bike. The tank I sold frankly was a better tank IMHO. It had an internal baffel to keep fuel from sloshing around and the filler cap threaded on. The Wilcox tank has no baffle and the filler cap is actually epoxied on, which was a real surprise.
It's a gorgeous tank, and it cost me nothing to swap. I also picked up a set of Omars rearsets and a Boyer ignition in the deal.
|
|
| Back to top |
|
|
tintin
Full Member
Joined: May 07, 2007
Posts: 96
|
| Posted: March 29, 2008, 8:22 pm Post subject: Re: Tintin's Cafe Racer project - BIG PICS WARNING! |
|
Well, it's turning into a weekend kind of project - not a lot of time during the week, and only an hour or two on weekends to fiddle. But it will get done.
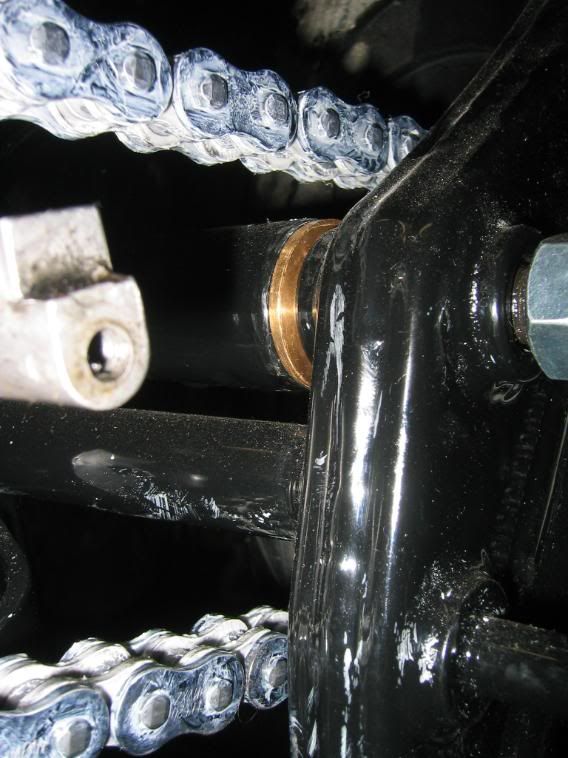
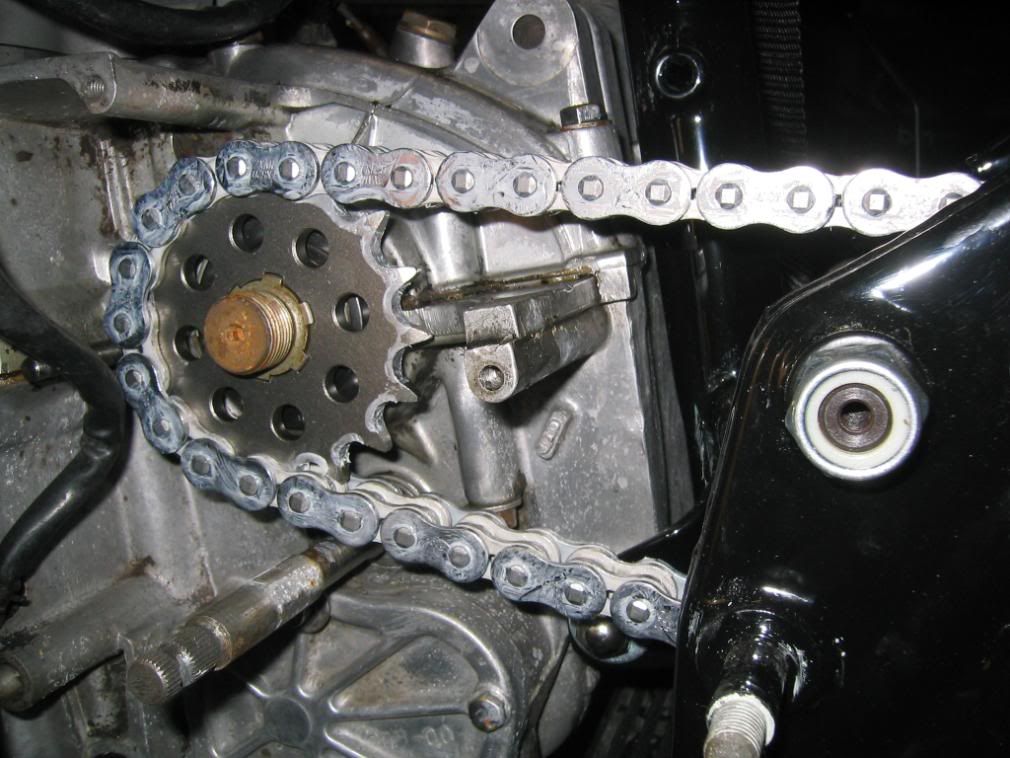
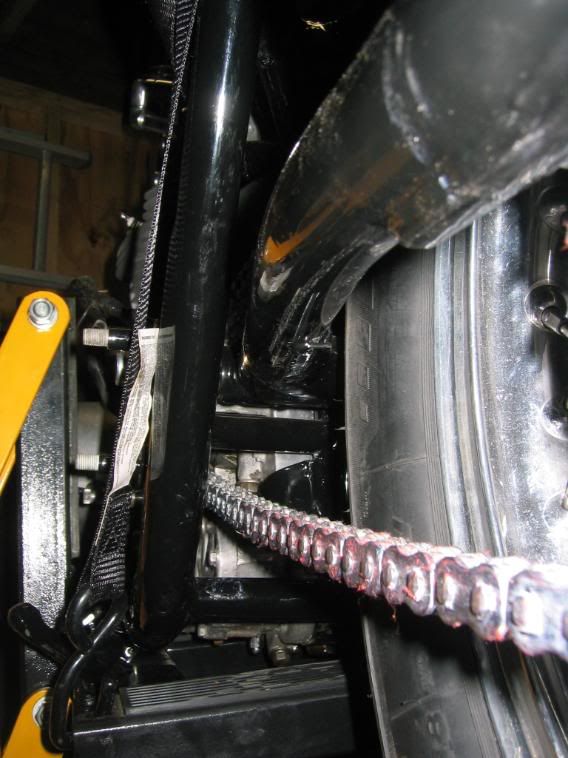
Not exactly sure how, and perhaps scrutiny of some photos will tell me my error, but dropping the rear wheel off to put the sprocket on and putting it back on seems to have solved my off-center problem - DOH! Weird.
Sprockets are in place (loose) and a quick wrap of my very long chain confirms a) things are lined up PERFECTLY and most importantly, the extra bracing I had added to the frame clears the chain with room to spare. That has been keeping me up at night since last May.
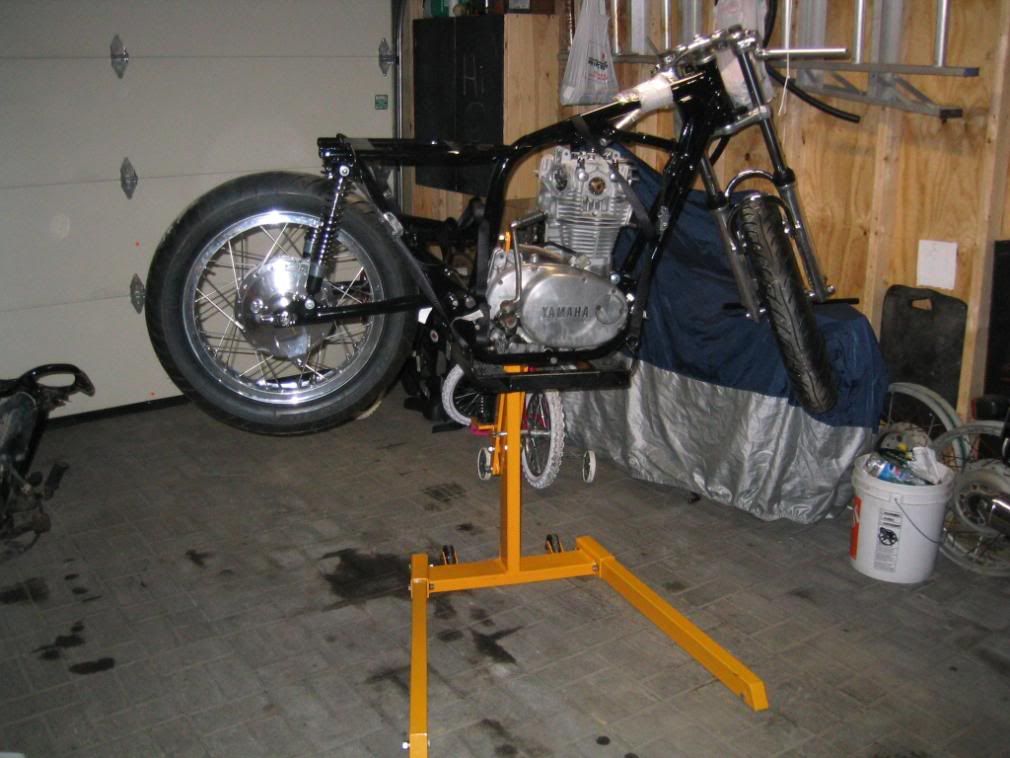
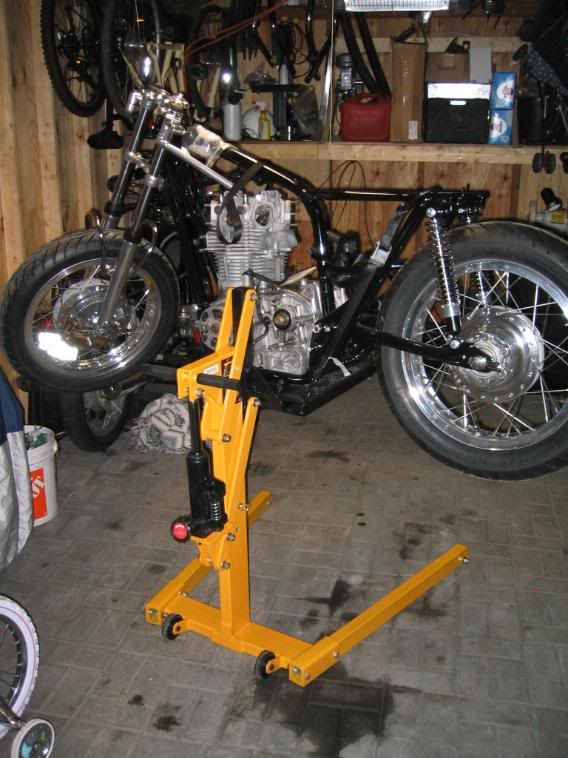
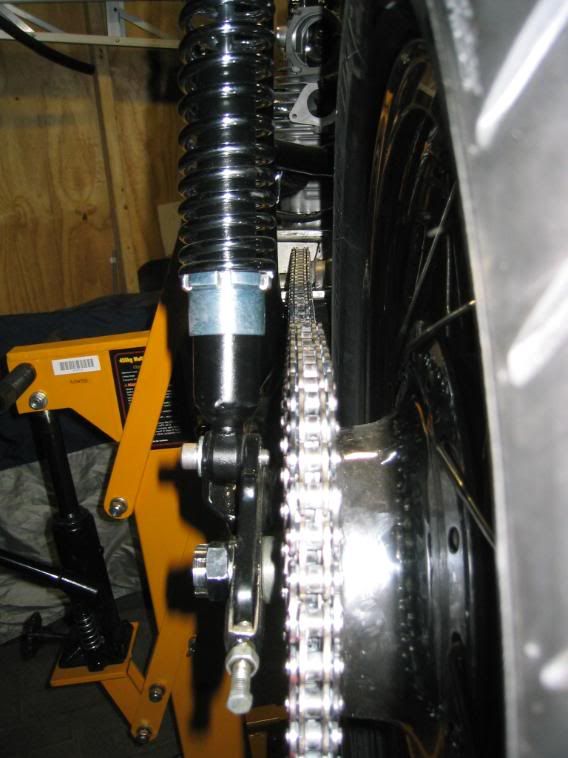
Got my new lift yesterday and put it together today - looks good. Totally useless for a BMW Airhead for obvious reasons, but very useful for the other bikes. Works like a charm. Just need to sort out how to stash it away in my garage.

|
|
| Back to top |
|
|
Retiredgentleman
650Rider Supporter

Joined: Mar 03, 2007
Posts: 2258
Location: Calgary, Alberta 1978 XS650 SE
|
| Posted: March 30, 2008, 1:26 am Post subject: Re: Tintin's Cafe Racer project - BIG PICS WARNING! |
|
Your bike is looking real good. Where did you buy that lift and how much did it cost? Can it be locked at different levels? Would the lift work OK with the exhaust pipes in place?
_________________
Accel Coil, Pamco Ignition, Heiden Oil Filter/Cooler, VR-115 Regulator, Double Bridge Rectifier, 17/33 gearing, 55 mpg |
|
| Back to top |
|
|
tintin
Full Member
Joined: May 07, 2007
Posts: 96
|
| Posted: March 30, 2008, 9:06 am Post subject: Re: Tintin's Cafe Racer project - BIG PICS WARNING! |
|
The lift is from good ol' Princess Auto - pretty sure there's one in Calgary. Was $200 - not the cheapest, and I'd splurge the extra $150 and buy the full table when it goes on sale, but I just don't have room for a full lift. It is a new product, so perhaps it will go on sale sometime soon.
It runs off a hydraulic jack, and the platform can be left at any level you want. At one point I had it set just so the tires were on the ground, making it easier to pull axles out etc. It has a safety pin that would prevent the platform from crashing to the ground in the event the jack fails. Ideally you'd set the platform just above the safety pin, which has two available positions.
You can see the pin in the first couple of pics just below the bottom arm lifting the platform. Adding positions would be as simple as drilling holes through the main body of the lift. But again, it's only needed if the jack fails.
Not sure how well it will work once the pipes are on. As-is, the lift is designed to lift the frame, and you wouldn't want it pushing up on the exhaust.
PA sold another more typical jack, like the one sold at Canadian Tire, that had Y shaped movable fingers on it which you could position to reach up between exhaust etc. and cradle frame rails. If this had those, it would be perfect. I'm considering making something like that and mounting it on the platform for use with the 650.
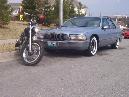
y other bike, a 1975 BMW R75/6 will never go up on this sort of lift. The engine is WAY too wide to allow the platform to sneak under and lift the bike.
|
|
| Back to top |
|
|
tintin
Full Member
Joined: May 07, 2007
Posts: 96
|
| Posted: June 9, 2008, 12:43 am Post subject: Re: Tintin's Cafe Racer project - BIG PICS WARNING! |
|
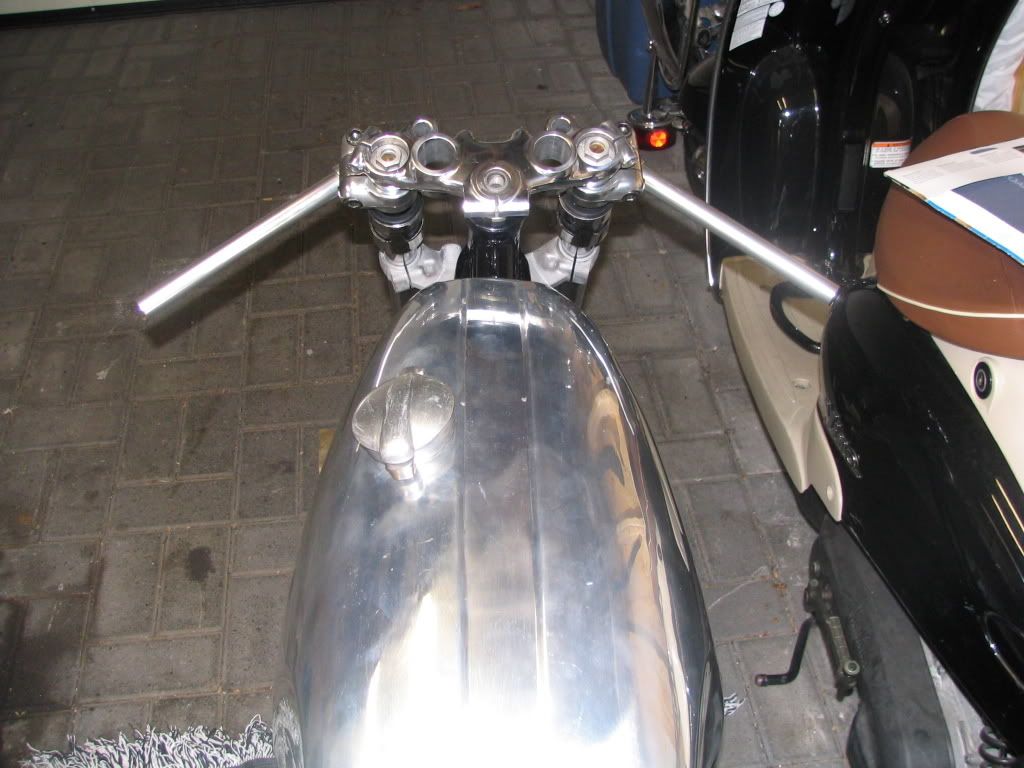
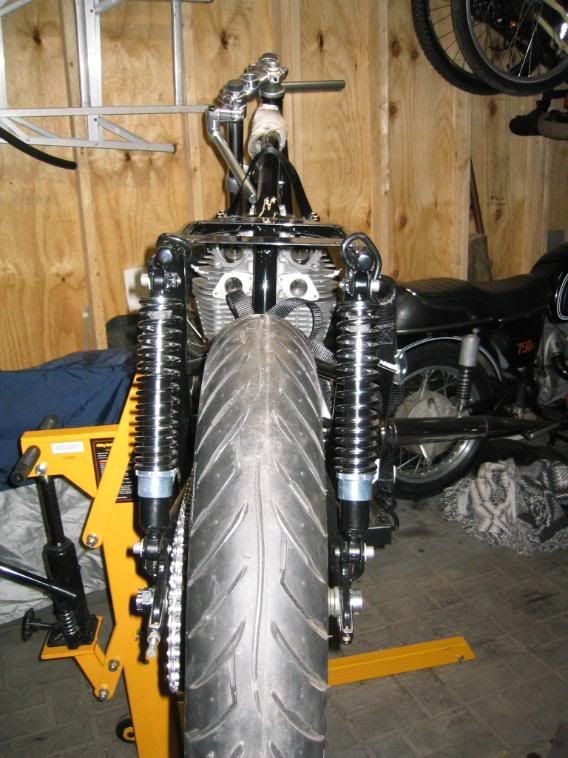
Got the tank mounted today - progress is slow but coming.
The toggle is just wired down to the frame right now (black heavy coat hanger ;)) - am going to sort that out this week with a couple of small rod ends and then a bolt across through the toggle.
Looks great! Took some creative use of foam (Active Surplus yesterday) and spray adhesive to get the foam the right thickness and shape to let the tank sit nicely on the frame and above the engine.

|
|
| Back to top |
|
|
xsMVxs
Full Member

Joined: Oct 10, 2007
Posts: 68
|
| Posted: June 11, 2008, 9:12 pm Post subject: Re: Tintin's Cafe Racer project - BIG PICS WARNING! |
|
sweetest freaking bike ever... i can't look at it anymore
_________________
And what is good, Phædrus,
And what is not good...
Need we ask anyone to tell us these things? |
|
| Back to top |
|
|
santiablo
Full Member
Joined: Apr 14, 2008
Posts: 98
|
| Posted: June 11, 2008, 10:55 pm Post subject: Re: Tintin's Cafe Racer project - BIG PICS WARNING! |
|
| well im not a big cafe fan but this is hands down a sweat as hell ride!! that seat is great! im glad you went with the round tube swing arm i think it looks lots beter!! you could try the longer one it would look cool but at the same time it looks frican cool how it is!! what are the bars mounted to ur front fender mounts and where did you get them?
|
|
| Back to top |
|
|
acetek
Full Member
Joined: Feb 24, 2008
Posts: 68
Location: PNW
|
| Posted: June 11, 2008, 11:24 pm Post subject: Re: Tintin's Cafe Racer project - BIG PICS WARNING! |
|
| Is that a stock width front rim ???? what size roadriders are you running? i am a little unsure of sizing ...Im going to have Buchannans lace up an 18 " rim to a suzuki 4ls double shoe drum for a resoto...cafe im building Along with every one else im a big fan....Your bike is awesome
|
|
| Back to top |
|
|
|
|
You cannot post new topics in this forum
You cannot reply to topics in this forum
You cannot edit your posts in this forum
You cannot delete your posts in this forum
You cannot vote in polls in this forum
You cannot attach files in this forum
You can download files in this forum
|
|
|
|
| |
Check out the new Honda CB750 Forum at CB750.com! A site dedicated to the great Honda SOHC and DOHC CB750.
Check out the new Yamaha XS400 Forum at XS400.com!
Yamaha xs650
xs650, xs, 650, forum, links, chopper, custom, yamaha, parts, forum, info,
information, bb, bulletin board, XS650 650Rider, Free Unrestricted xs650
forum, Personal photo albums, Post images in Forum, News columns, Daily blog,
Links, Event calendar, Information for Yamaha XS650
Interactive software released under GNU GPL,
Code Credits,
Privacy Policy
|